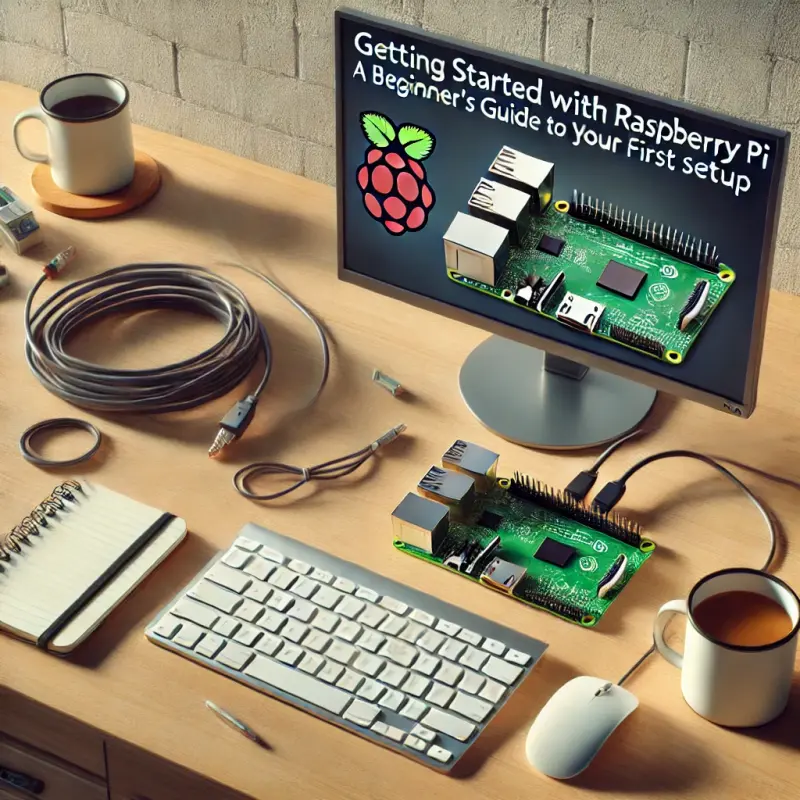
The Raspberry Pi is a small, affordable computer that’s packed with potential. Whether you’re interested in programming, electronics, or simply tinkering with new technology, the Raspberry Pi offers a versatile platform that’s accessible to both beginners and experts alike. This guide will walk you through the process of setting up your Raspberry Pi, from unboxing to running your first program. By the end of this tutorial, you’ll have a fully functional Raspberry Pi ready for your projects.
Overview of Raspberry Pi Models
Before diving into the setup process, it’s helpful to understand the different Raspberry Pi models available. The Raspberry Pi Foundation has released several versions of the Pi over the years, each with varying specifications to cater to different needs.
- Raspberry Pi 4 Model B: The most recent and powerful model, available with 2GB, 4GB, or 8GB of RAM. It features a quad-core Cortex-A72 processor, dual HDMI ports, USB 3.0, and Gigabit Ethernet.
- Raspberry Pi 3 Model B+: An older but still very capable model, with a quad-core Cortex-A53 processor, 1GB of RAM, and support for Wi-Fi and Bluetooth.
- Raspberry Pi Zero W: A much smaller, lower-powered model that’s ideal for compact projects. It includes 512MB of RAM and built-in Wi-Fi and Bluetooth.
For this guide, we’ll focus on setting up the Raspberry Pi 4 Model B, but the steps are largely similar across all models.
Installing the OS (Raspberry Pi OS)
The Raspberry Pi doesn’t come with an operating system pre-installed. Instead, you’ll need to download and install one yourself. The most popular choice is Raspberry Pi OS (formerly known as Raspbian), which is a Debian-based operating system optimized for the Raspberry Pi hardware.
Step 1: Download Raspberry Pi Imager
- Head over to the official Raspberry Pi website and download the Raspberry Pi Imager for your operating system (Windows, macOS, or Linux).
- Install the software and launch it.
Step 2: Prepare the MicroSD Card
- Insert a microSD card (at least 8GB recommended) into your computer using an SD card reader.
- In the Raspberry Pi Imager, click on “Choose OS” and select “Raspberry Pi OS (32-bit)”.
- Next, click on “Choose SD Card” and select the microSD card you inserted.
- Click on “Write” to start installing the OS onto the microSD card. This process may take a few minutes.
Step 3: Insert the MicroSD Card into the Raspberry Pi
- Once the installation is complete, safely eject the microSD card from your computer.
- Insert the microSD card into the microSD slot on the underside of the Raspberry Pi.
Basic Terminal Commands
After setting up the Raspberry Pi OS, you’ll likely find yourself using the terminal frequently. The terminal allows you to interact with the operating system using text-based commands, which can be more efficient and powerful than using a graphical interface.
Here are a few basic terminal commands to get you started:
ls: Lists the files and directories in your current directory.cd [directory]: Changes your current directory to the specified directory.pwd: Prints the working directory, showing your current location in the filesystem.sudo apt update: Updates the list of available packages and their versions, but it does not install or upgrade any packages.sudo apt upgrade: Installs the newest versions of all packages currently installed on the system.
Using these commands, you can navigate the filesystem, manage files, and install software directly from the terminal.
Running a Simple Python Script
Python is the default programming language on the Raspberry Pi, making it a great tool for both beginners and advanced users. Let’s write and run a simple Python script to ensure everything is working correctly.
Step 1: Open the Terminal
- Click on the terminal icon in the top left corner of the Raspberry Pi desktop.
Step 2: Create a Python Script
- In the terminal, type
nano hello.pyto open the Nano text editor and create a new Python file. - Type the following code into Nano:
python
print("Hello, Raspberry Pi!")- Press
Ctrl + X, thenY, andEnterto save the file and exit Nano.
Step 3: Run the Python Script
- Back in the terminal, type
python3 hello.pyand press Enter. - You should see the text “Hello, Raspberry Pi!” printed in the terminal.
Congratulations, you’ve just run your first Python script on the Raspberry Pi! This simple exercise demonstrates how easy it is to start coding on the Raspberry Pi, and you can now expand on this by writing more complex programs.
Connecting Peripherals (Keyboard, Mouse, Monitor)
To interact with your Raspberry Pi, you’ll need to connect some basic peripherals, such as a keyboard, mouse, and monitor. Here’s how to get everything set up:
Step 1: Connect the Keyboard and Mouse
- Plug a USB keyboard and mouse into the USB ports on the Raspberry Pi. If you’re using a Raspberry Pi 4, you’ll have both USB 3.0 and USB 2.0 ports; either will work, but USB 3.0 ports (blue) offer faster data transfer rates.
Step 2: Connect the Monitor
- Connect a monitor to the Raspberry Pi using an HDMI cable. The Raspberry Pi 4 has two micro-HDMI ports, so you can connect up to two monitors for a dual-display setup.
- If your monitor uses a standard HDMI connection, you’ll need a micro-HDMI to HDMI cable or adapter.
Step 3: Power Up the Raspberry Pi
- Finally, connect the power supply to the Raspberry Pi and plug it into an electrical outlet. The Raspberry Pi will automatically power on, and you should see the boot sequence displayed on the monitor.
Once the Raspberry Pi has booted, you should be greeted by the Raspberry Pi OS desktop environment. From here, you can start exploring the many possibilities that the Raspberry Pi offers.
Setting up your Raspberry Pi is a straightforward process that opens the door to countless possibilities in computing, programming, and electronics. Whether you’re interested in creating your own projects, learning to code, or experimenting with new technology, the Raspberry Pi provides a versatile platform that’s both powerful and affordable. By following this guide, you’ve laid the foundation for your Raspberry Pi journey, and you’re now ready to explore and create to your heart’s content. Happy tinkering!